How to obtain the latest version of LAMP on Ubuntu:
(
Apache 2.2 + MySQL 5.1 + PHP 5.2 + PERL 5.10 +PEAR + SQLite + ProFTPD + phpMyAdmin + Webalizer + phpSQLiteAdmin + XAMPP Control Panel)
http://www.ubuntuforums.org/223410
http://www.apachefriends.org/f/viewtopic.php?t=21531#108517
The commands in this HOWTO must be entered in the terminal:
Applications -> Accessories -> Terminal
Download XAMPP to your desktop and extract the files:
http://apachefriends.org/xampp-linux
cd ~/Desktop

wget http://www.apachefriends.org/download.php?xampp-linux-1.7.1.tar.gz

sudo tar xvfz xampp-linux*.tar.gz -C /opt
Create a XAMPP start menu entry:
cd ~/.local/share/applications

gedit xampp-control-panel.desktop
Paste the following into the open file:
[Desktop Entry]

Comment=Start/Stop XAMPP

Name=XAMPP Control Panel

Exec=gksudo /opt/lampp/share/xampp-control-panel/xampp-control-panel

Icon[en_CA]=/opt/lampp/htdocs/xampp/img/logo-small.gif

Encoding=UTF-8

Terminal=false

Name[en_CA]=XAMPP Control Panel

Comment[en_CA]=Start/Stop XAMPP

Type=Application

Icon=/opt/lampp/htdocs/xampp/img/logo-small.gif
Save and close the file.
Publish:
XAMPP uses /opt/lampp/htdocs as the root web directory, but you can publish pages in your home directory this way.
cd ~

mkdir public_html

sudo ln -s ~/public_html /opt/lampp/htdocs/$USER
Now any files and folders you place in ~/public_html will be
published to your personal webserver.
Start XAMPP via the terminal:
cd /opt/lampp

sudo ./lampp start
Stop XAMPP (if necessary):
cd /opt/lampp

sudo ./lampp stop
Via the XAMPP Control Panel:
Applications -> Other -> XAMPP Control Panel
If Apache2 or MySQL is already running, then XAMPP will not start. You must stop these applications, if you want to use XAMPP:
sudo /etc/init.d/apache2 stop

sudo /etc/init.d/mysql stop
PHP5 is the default, but you can switch between PHP4 and PHP5, if you like:
cd /opt/lampp

sudo ./lampp php4

sudo ./lampp php5
Open your new webpages at:
http://localhost/username/
Security:
http://apachefriends.org/xampp-linux/381
1. The MySQL root user has a blank password.
2. MySQL is accessible via your local network.
3. ProFTPD has user “nobody” with password “lampp”.
4. PhpMyAdmin is accessible via the local network.
5. Examples are accessible via the local network.
6. MySQL and Apache running under the same user “nobody”.
To configure some of the security features of xampp:
cd /opt/lampp

sudo ./lampp security


 Posts
Posts


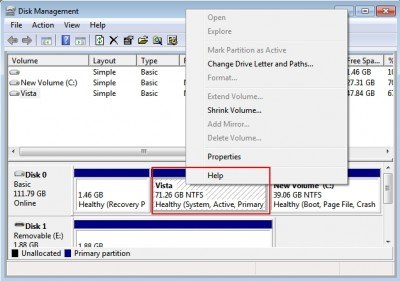
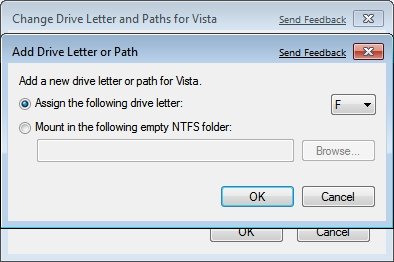
 . So here am posting a Tutorial How you can Get Back youe Missing Hard Drive in Windows 7. Its simple and Very Easy to get back the Drive.